
How to Make No Sew Window Valance? (Step-by-Step Guide)

No-sew projects have become a popular trend among DIY enthusiasts.
They allow anyone to create beautiful and customized home decor without the need for sewing skills.
These are simple, yet elegant window treatments that can transform any room.
In this post, we will guide you through the steps to make a no sew window valance, ensuring you achieve professional-looking results with minimal effort.
Step 1: Get the Required Materials and Tools
List of Required Materials
- Fabric: Choose types like cotton, linen, or burlap. Patterns and colors should complement your home decor.
- Fabric Glue: Essential for bonding fabric pieces together without sewing.
- Iron-On Hem Tape: Used to create finished edges.
- Curtain Rod: To hang the valance.
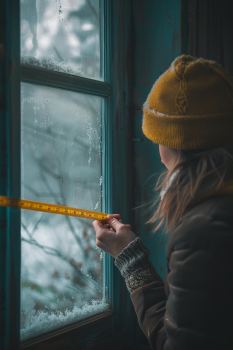
- Measuring Tape: For accurate measurements.
- Sharp scissor: To cut fabric cleanly.
- Iron and Ironing Board: For applying hem tape.
- Decorative Elements (Optional): Ribbon, or trim, or beads for added flair.
Step 2: Selecting the Right Fabric
Selecting the right fabric is crucial. Here are some tips:
- Complement Your Decor: Choose fabrics that match or enhance your current decor.
- Fabric Weight and Texture: Lightweight to medium-weight fabrics like cotton or linen work best.
- Patterns and Colors: Bold patterns can make a statement, while neutral tones offer a timeless look.
Calculating Fabric Requirements
Measure your window to determine fabric needs:
- Width: Measure the width of your window and add extra for gathering.
- Length: Decide the desired drop length of your valance.
- Extra Fabric: Include additional fabric for hemming and rod pocket.
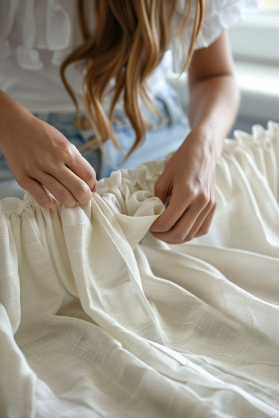
Step 3: Preparing the Fabric
Measuring and Cutting
Follow these steps for precise measurements and cuts:
- Measure Fabric: Use a measuring tape to mark the dimensions on the fabric.
- Cut Fabric: Ensure straight cuts by using a ruler or yardstick as a guide.

Creating Hemmed Edges
Neaten the edges using hem tape:
- Apply Hem Tape: Place the tape along the fabric edges.
- Iron the Edges: Use an iron to secure the tape, following the manufacturer’s instructions.
Step 4: Assembling the Valance
Creating a Rod Pocket
Make a rod pocket for hanging:
- Fold Top Edge: Fold the top edge over to create a pocket for the rod.
- Secure with Glue/Tape: Use fabric glue or fusible bonding tape to hold the fold in place.
Conclusion
Creating a no-sew window valance is a simple and versatile project that can elevate the look of any room.
By following these steps, you can achieve professional results without needing sewing skills.
Experiment with different fabrics and styles to find the perfect match for your home.
Dive into this DIY project today and see how easy it is to add a touch of elegance to your windows.

- 16 Funky Living Room Ideas to Bring Colors, Fun & Personality to Your Space - November 9, 2025
- 12 Small Bathroom Ideas on a Budget That Make Your Space Look Bigger & Stylish - November 6, 2025
- 20 Modern Boho Living Room Ideas That Are Cozy & Absolutely Stunning - November 2, 2025